Reinstalling the OS on your VPS (Virtual Private Server) might sound daunting, especially if you’re new to managing your server. However, it’s a straightforward process you can easily handle with the right instructions. In this guide, we’ll walk you through the steps to reinstall the OS on your VPS using the VPS Control Panel provided by AvroHost.
Why Reinstall Your OS?
Before we dive into the steps, let’s quickly discuss why you might want to reinstall your OS:
- Performance Issues**: Over time, your server might become sluggish due to accumulated junk or misconfigured settings.
- Security Concerns**: If you suspect that your server has been compromised, reinstalling the OS can help ensure a clean, secure environment.
- Starting Fresh**: Sometimes, starting with a clean slate is the best way to get your server exactly how you want it.
Note:
- You will need the VPS Panel login credentials.
- Backup any important data on your VPS, as reinstalling the OS will erase all existing data.
Step-by-Step Guide to Reinstalling Your OS
1. Log In to the VPS Control Panel
First, you need to log in to your VPS Control Panel. Open your web browser and go to [VPS Control Panel](https://vps.avrohost.com:4085). Enter your username and password to log in.
2. Go to Your VPS
Once you are logged in, you will see a dashboard with a list of your VPS instances. Click on the VPS instance that you want to reinstall the OS on.
3. Click on Install
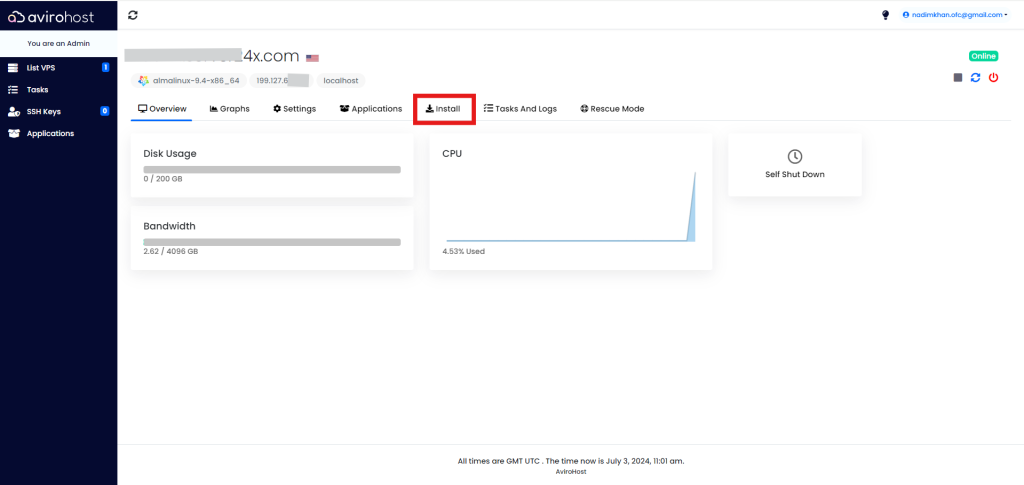
In the VPS management section, look for the `Install` button. This button will initiate the OS installation process.
4. Select the OS Version
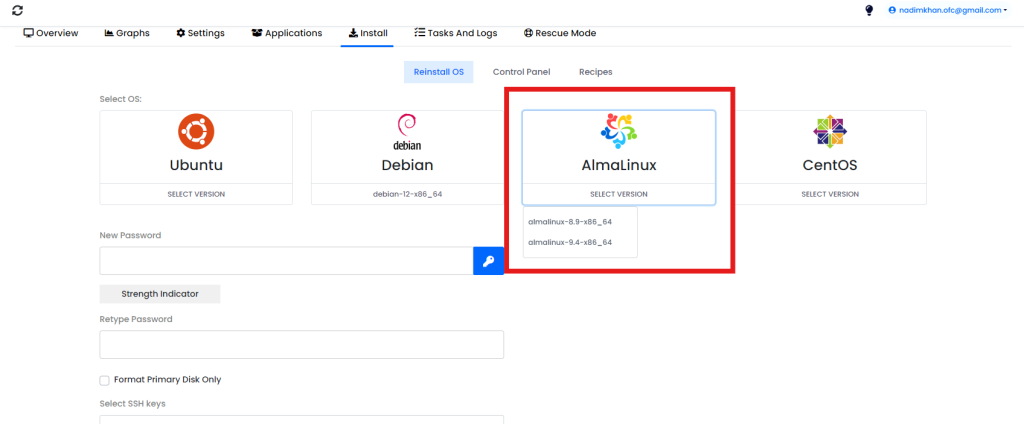
A new window or section will appear, prompting you to select the OS version you want to install. Choose the desired OS from the dropdown menu. Ensure that you select the version that best suits your needs.
5. Set the Root Password
Next, you will need to set the root password for your new OS installation. This is an essential step as it secures your server. Make sure to choose a strong password and store it securely.
6. Optional: Format Primary Disk Only
If you want to format the primary disk only, you can select the `Format Primary Disk Only` option. This step is optional but can be useful if you want to ensure that only the primary disk is formatted, leaving other data disks intact.
7. Click on Reinstall
Finally, click on the `Reinstall` button to start the OS reinstallation process. The VPS Control Panel will now handle the rest. This process may take several minutes, so be patient.
The re-installation might take a bit of time. Try to log in again to your VPS after 10 minutes of re-install.
Conclusion
Reinstalling the OS on your VPS is a simple process if you follow the steps outlined above. It can help you resolve performance issues, enhance security, and give you a fresh start. Always remember to back up your data before performing a reinstallation to avoid any data loss.
By following this guide, even beginners can confidently reinstall their OS and ensure their VPS is running smoothly. Happy hosting!
—
If you have any questions or run into any issues during the reinstallation process, feel free to reach out to AvroHost support for assistance.